Identity Finder
Main Content
*This page contains general information about Identity Finder, and links to download Identity Finder for Windows and Mac OS X.
What is Identity Finder?
Identity Finder is a software tool which assists in preventing data theft by finding the locations of sensitive data on a computer. Sensitive data includes but is not limited to: passwords, social security numbers, credit card numbers, and bank account numbers. Identity Finder searches selected areas of your computer for sensitive data, and provides tools to protect or securely dispose of this information.
Download Link: Download Identity finder
Where Should Identity Finder be Installed?
Identity Finder should only be installed on computers used for University business (including personal devices used by employees), and should not be installed on lab computers around campus.
Installing Identity Finder
Windows machines included within Information Technology’s Active Directory will have identity finder installed automatically, for all other machines a Windows MSI installer and Mac OSX PKG installer can be obtained by faculty from the campus ftp server at the following address:
https://ftp.siu.edu:1080/IdentityFinder/
When Identity Finder first installs it will prompt you to enter a password. This password is used to save your settings and to securely encrypt files.

Running a Scan with Identity Finder
After Identity Finder is installed it will automatically be included in scheduled campus wide scans, along with giving the user an option to immediately begin their first scan by selecting the start search now option as shown below

It is also possible to initiate a scan manually at any time.
Windows:
The Identity Finder application can be opened on your machine by navigating to the Identity Finder folder in your Start Menu and running the Identity Finder Program.
To Initiate a Scan simply click the Start Button as highlighted below.

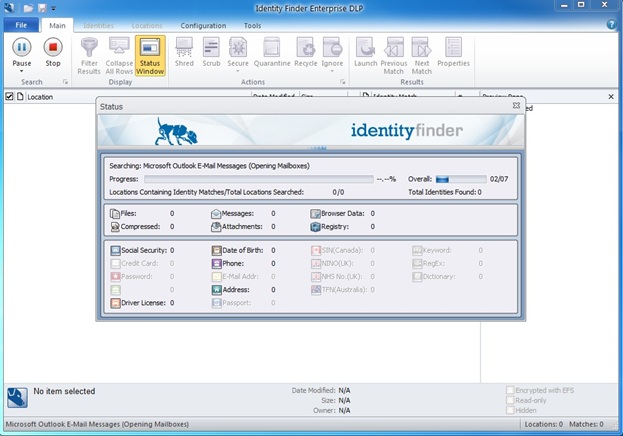
Identity Finder will then pop up a window and begin scanning local files on your machine as shown below.

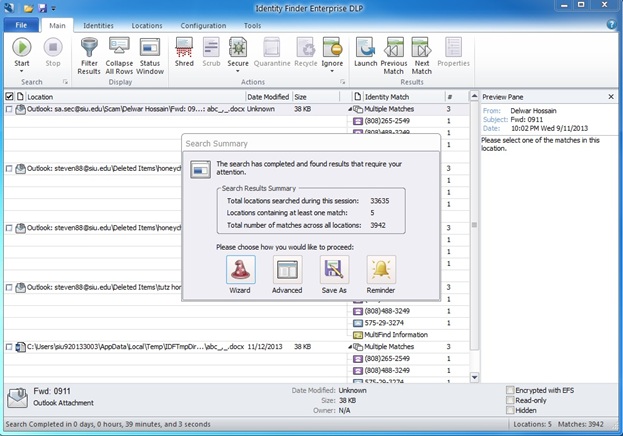
The application will continue until it has completed scans of all files, this process may take some time. Afterwards results of the scan will be displayed on the results page as shown below.

The user may then select the Wizard to move through each item step by step, or select advanced mode to choose their own action for each item.
For any matches found by Identity Finder the user may take the following steps: Shred – Securely delete the file if it is no longer required. Scrub – Remove the sensitive data from the file. Quarantine – Move the file containing sensitive data to a separate location and shred the original. Recycle – Move the file to the recycle bin to delete at a later time. Ignore – Ignore the item if it is a false positive, or if the user does not want the item to appear in subsequent searches.
Learn more about when to "Shred" information.
![]()
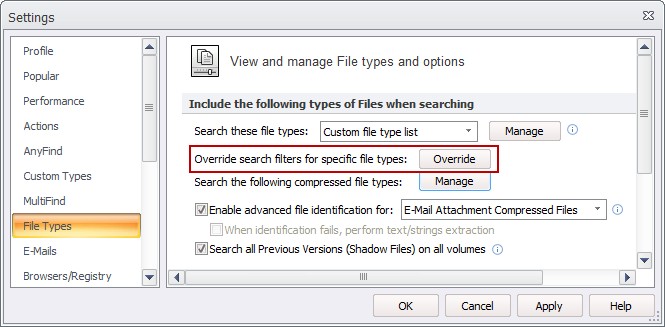
What is overriding the search filter?

Learn about when to "Scrub" information and how to do it.
![]()


