Windows Device
/https://siu.edu/search-results.php
Last Updated: Jun 04, 2025, 11:54 AM
Printing from a Windows Device
Before printing from your personal device, you must install the Pharos Print client.
- Download the Print Client for your device.
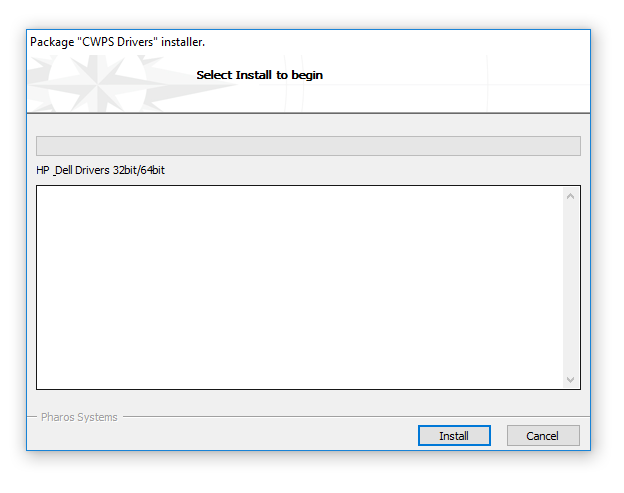
- Run the installer. If you are prompted by the User Account Control, select Allow.
- If you get a Microsoft Defender SmartScreen warning, please click Run Anyways.
- Click Install.

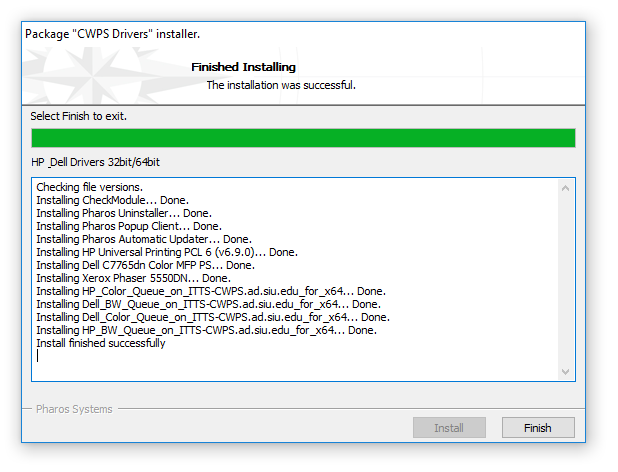
- Click Finish. The installer will close.

- To print to a CWPS printer, select Print as you normally would within your browser or program.
- Select the appropriate printer from the list.
- To print on one of the HP Printers select one of the options below.

- To print on one of the Dell Printers select one of the options below.

- After verifying that you have chosen the correct printer, click Print.
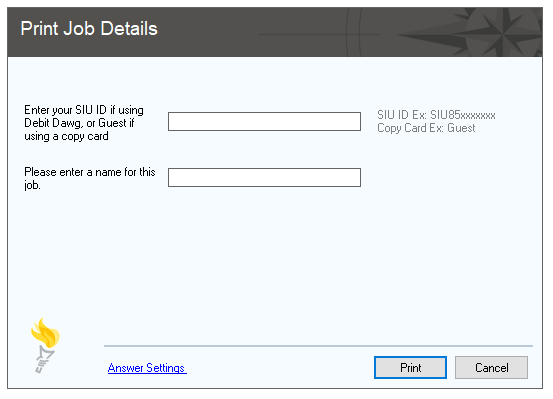
- Once you have selected Print on your computer (whether you are printing a webpage, document, presentation slides, etc.) a Pharos popup screen will appear.

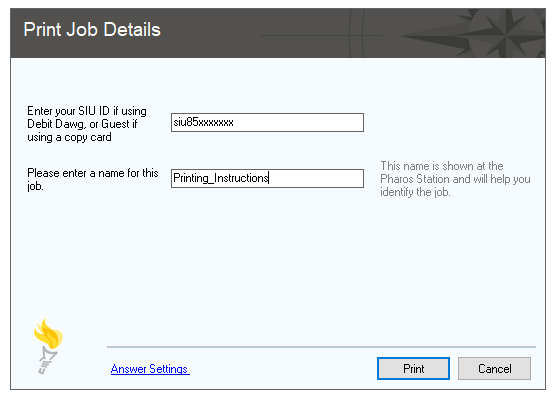
- Enter your information in the dialog box, then click Print. All print jobs are sent to the same queue, meaning if you and another person have a print job called "Document1" it will be difficult to distinguish which one is yours.

- After clicking Print go to the desired CWPS printer and swipe your Debit Dawg (Student ID) card or Copy card.
- The light indicator on the card reader's light should flash green when the card is read. If the light flashes red or yellow, try swipping you card again.
- Make sure the card's magnetic strip is facing the correct way.
- The printer should log you in. Select your job and click Print.
- Go to your Start menu and select the Pharos folder.
- Select Uninstall Pharos.
- You will be prompted by the Pharos Uninstallaton software. Select Next.
- Select ALL Pharos Components within the list. Then continue to select Next until the uninstaller has finished.
- Select Finish. You will then be prompted to restart your computer.