Oracle and Golden
Using Oracle Client and Golden
Oracle Client and Golden can be used together to query the Oracle database outside of the EBS Application. To use Golden with the AIS system, you must have the Oracle client installed and configured correctly. The latest version of Oracle Instant Client is 12.x and the latest version of Golden is 6.x.
Setup Information
Installing Oracle 12 Client on Windows 10
- Download Oracle Instant Client 12.
- Once the client is installed successfully, place the tnsnames.ora file in the C:\ Oracle12_1 directory. You may then proceed with the installation of the Golden software.
- Copy Instantclient_12_1 folder (from instantclient-basic-nt-12.1.0.2.0.zip) directly under the C:\ directory
- Copy tnsnames.ora to C:\Instantclient_12_1
- Right-Click Computer or This PC in windows explorer and select Properties
- Choose Advanced system settings from the list on the left
- In the System Properties window on the ‘Advanced’ select the Environment Variables button
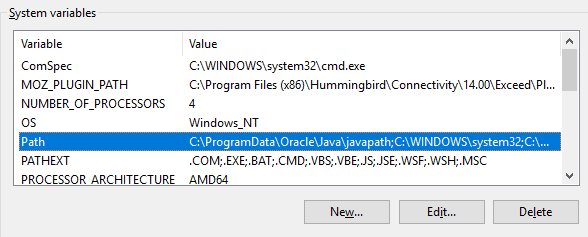
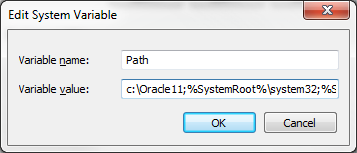
- Under the System variables section scroll down and select Path
- Click the Edit button
In Windows 10:
1. Click New and enter C:\Instantclient_12_1 and click OK.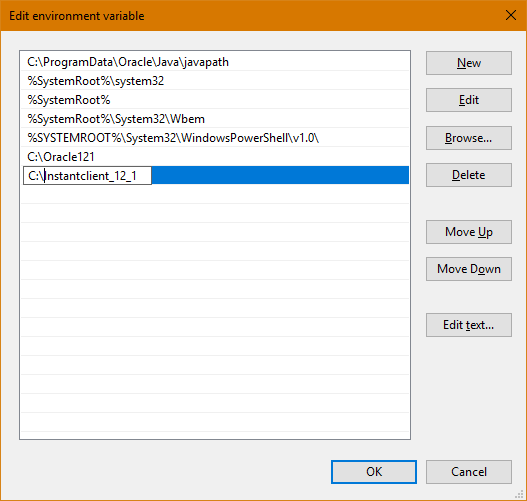
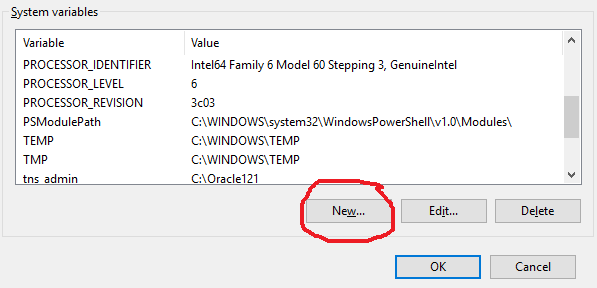
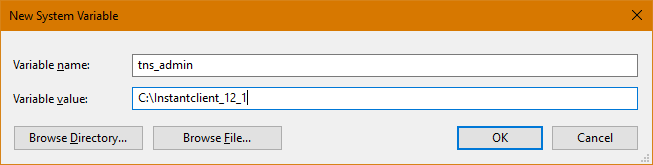
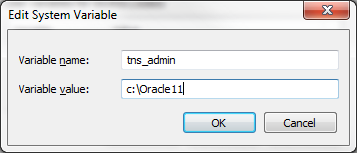
2. Click the New button under system variables and enter tns_admin for variable name and c:\Instantclient_12_1 for variable value and click OK to save.
3. Click OK to save it and OK until you are back to the Computer Properties window.
4. Close the window and restart your computer.
On older versions of Windows:
1. On the Variable value line go to the beginning of the string.
2. Type the path to the Oracle files c:\Instantclient_12_1 place a semicolon after it then click the OK button.
3. Click the New button to create a new system variable.
4. Enter tns_admin in the Variable name field and c:\Instantclient_12_1 in the Variable value field.
5. Click OK to save it and ‘OK’ until you are back to the Computer Properties window.
6. Close the window and restart your computer.
Installing Golden 6.x
A new tnsnames.ora file will be sent to your LAN admin through the LAN admin listserv.
If you are a new Golden user, contact your LAN admin to obtain the correct tnsnames.ora file. Please install the Oracle 12 Instant Client. See the Oracle 12 Instant Client Instructions on next tab. Once the client is installed successfully, place the tnsnames.ora file in the C:\ Oracle12_1 directory. You may then proceed with the installation of the Golden software.
If you are an existing Golden user, contact your LAN admin to obtain the correct tnsnames.ora file. If you connect to databases other than AIS, do not overwrite the existing tnsnames file. You must edit the file to replace the AIS entries. If you only connect to AIS database(s), replace the tnsnames.ora file in the Oracle client installation directory (for example, C:\Oracle12_1). Please follow the steps below to configure Golden to use the new tnsnames file.
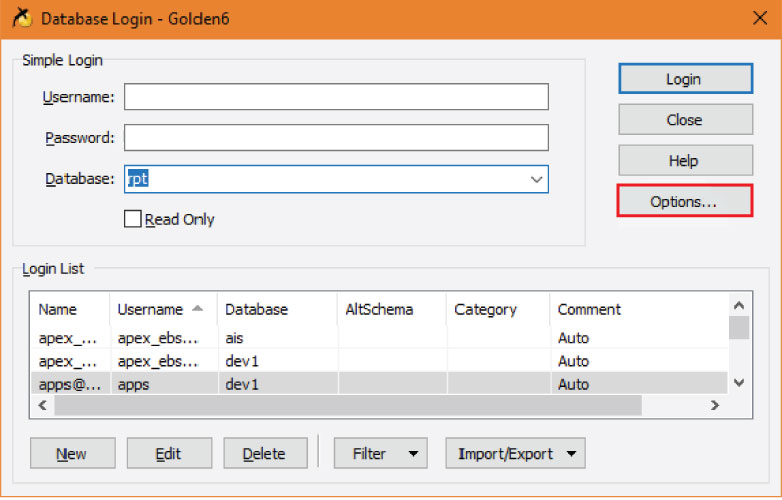
1. Open Golden.
2. Select the Option button on the Database Login screen.
3. You may need to select the More button for this to be visible.
4. Remove any entries that are saved in the username, password, and database fields.
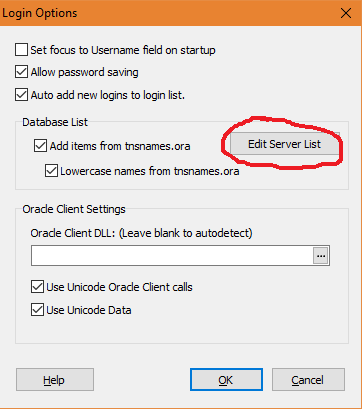
5. Choose Edit Server List.
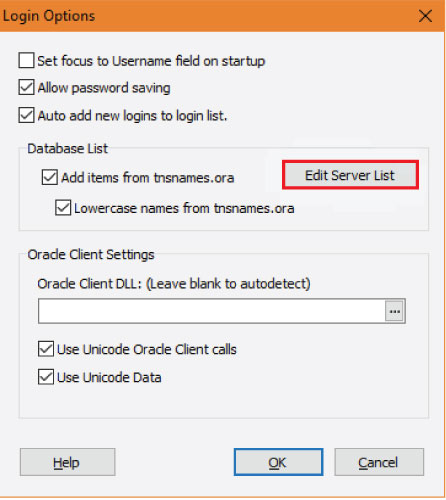
6. You should return to the Login Options screen.
7. Uncheck Use TNSNames.ora, then click OK.
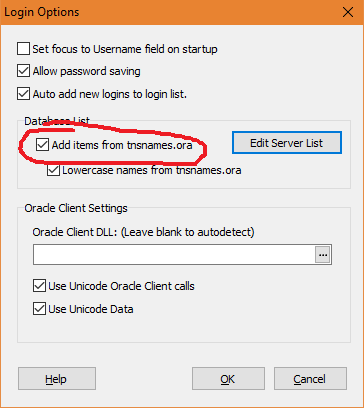
8. After Go back to login screen, change Check TNSNames.ora option to check Add items from tnsnames.ora and click OK. Also, Oracle Client DLL should be left blank for Golden to auto detect. If it doesn’t auto detect, then use C:\Oracle121\oci.dll (or C:\Oracle11 path depending on where the Oracle Instant Client is installed). Use the same screen shot from above.
9. Restart Golden.
10. Go back to the Login Options screen as above.
11. Check TNSNames.ora option, and click OK.
12. You should then return to the Database Login screen and click Close.

13. Close Golden.
14. Restart Golden.
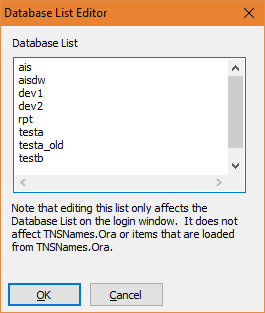
15. Depending on your version of Golden, your Database drop-down box may be empty or it may contain the 5 entries that are now in the tnsnames.ora file (ais, rpt, trnt, testa, testb).